This tech tip describes how to verify the factory-set voltage range of a MicroGenius 2 battery charger and change it if necessary. All MicroGenius 2 chargers are electronically programmed at the factory for either 12v or 24V application based on the customer order.
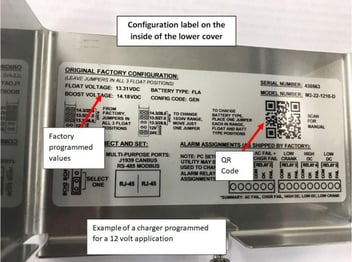
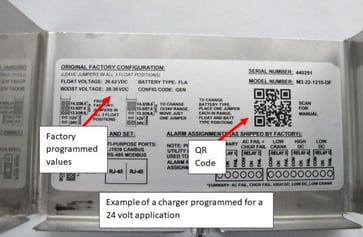
To verify the voltage for which a particular charger is set, remove the bottom cover of the charger. USE CAUTION IF THE CHARGER IS ALREADY INSTALLED AS IT MAY BE CONNECTED TO ELECTRICAL POWER. Inside the bottom cover is a label that shows chargers settings. The float and boost values printed on this label show the voltage range for which the charger is set: 12 volt range or 24 volt range. The first image below shows the label of a charger set for the 12V range; the second image shows a charger set for the 24V range.
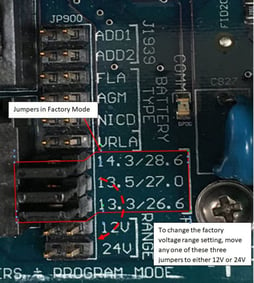
If your charger is factory-set for 12 volt application, but you are planning to use it in a 24 volt system, move one of the three jumpers located in the lower section of the charger to the 24 volt pins. It does not matter which of the three jumpers you use. Likewise, for chargers that are factory-set for 24 volt application, but which you need for a 12 volt system, move a jumper to the 12 volt pins. Use your smart-phone to scan the QR code to take you directly to the complete product manual on the SENS website.